
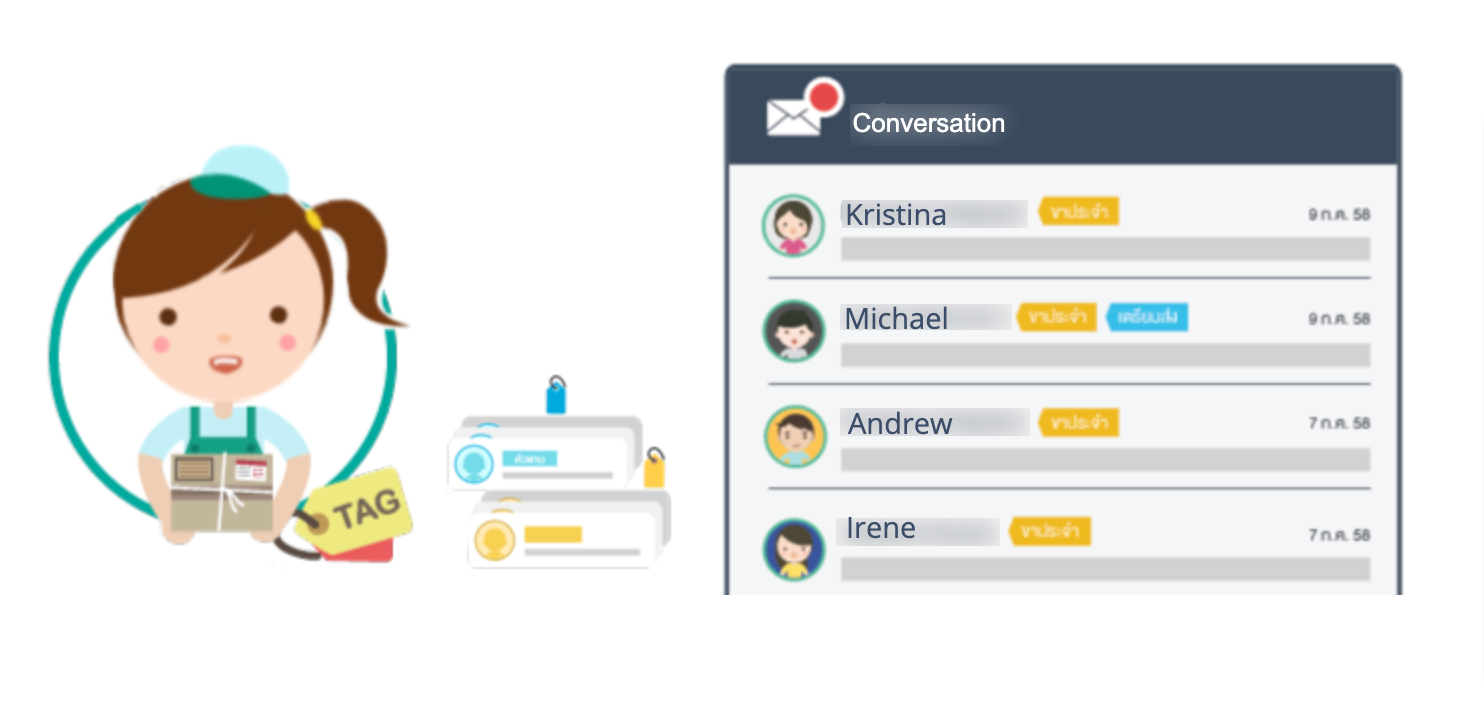
Most merchants are experiencing a high volume of customer inquiries and difficulty categorizing customers. Stores have to spend a long time scrolling through the customer's inquiries by themselves for a long time to find it. Page365 system has developed tags (customer tag) to help merchants categorize customers to make it easier to categorize and find more customer inquiries. This makes it easy for merchants to find conversations between merchants and customers.
Tags can also be used to send broadcast messages including tagging to assign admins as well.
How to set up tags and tagging customers
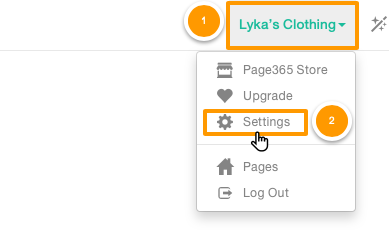
1. Click "Store Name" in the upper right corner.
2. A menu will appear, click "Settings”.
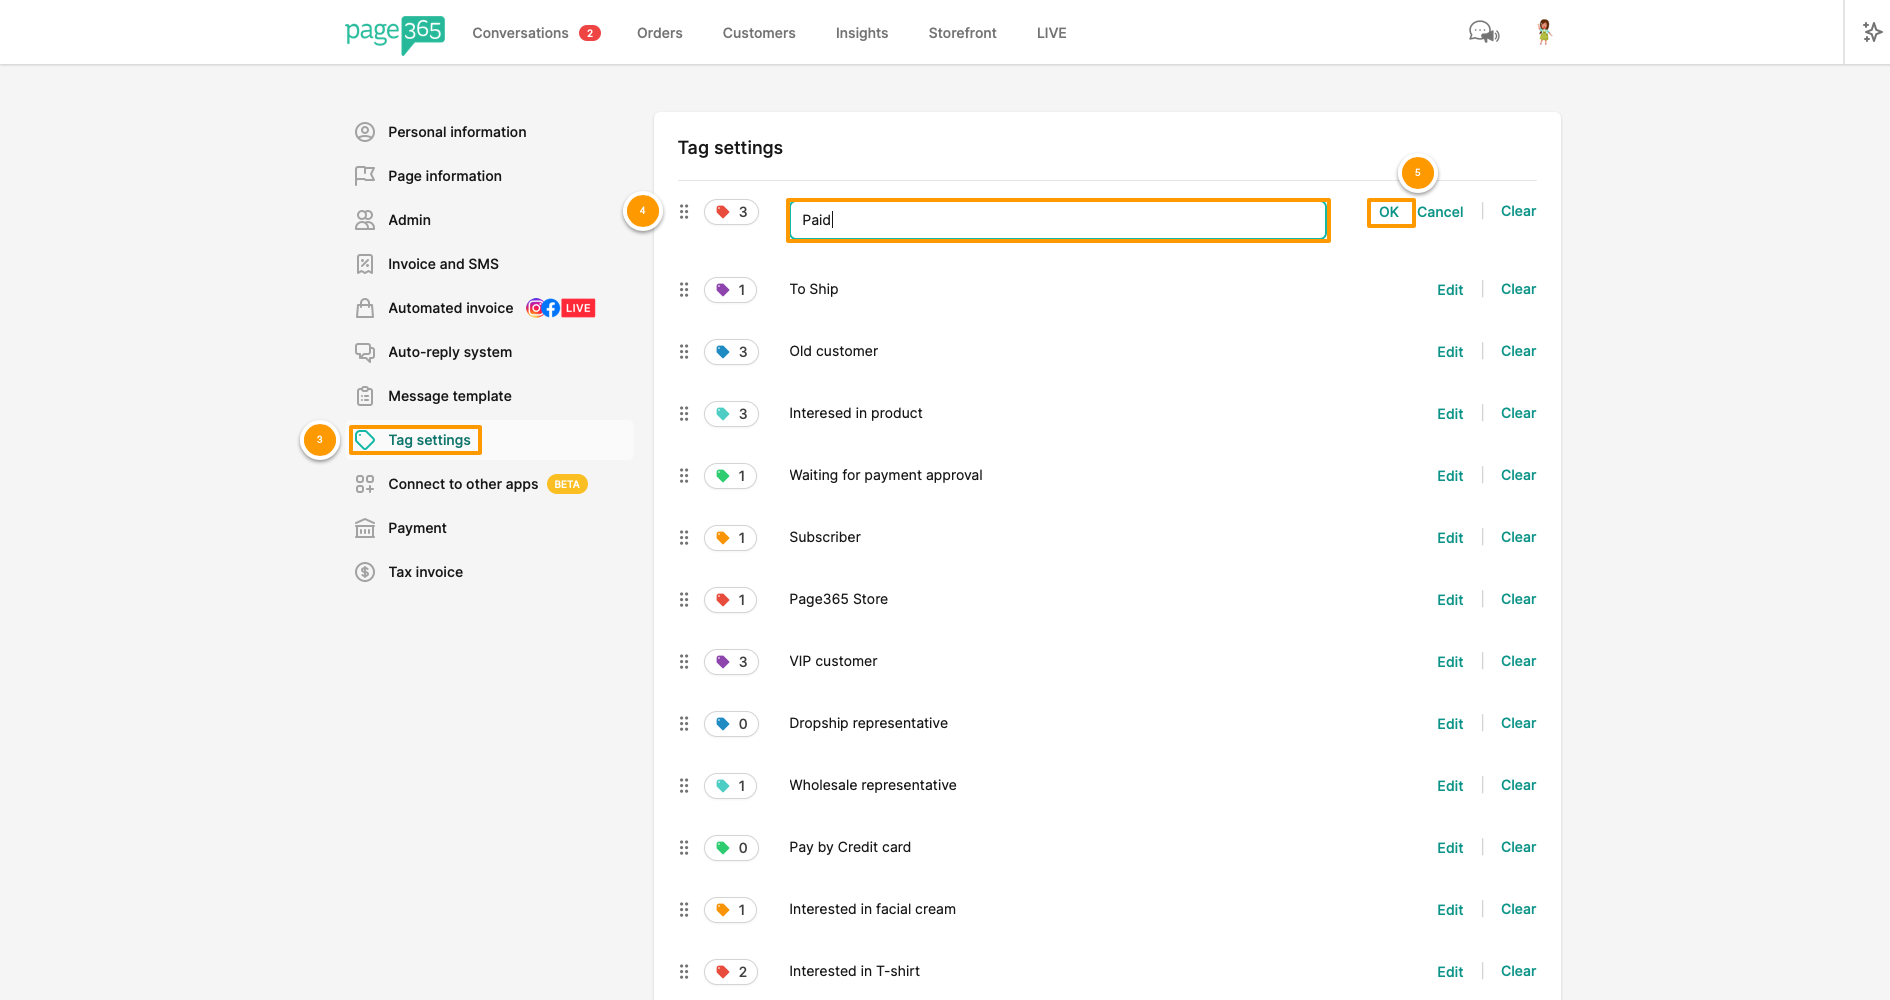
3. Click "Set Tag"
4. Click the desired tag to name the tag.
5. Once the name has been set, click "Save/OK”.
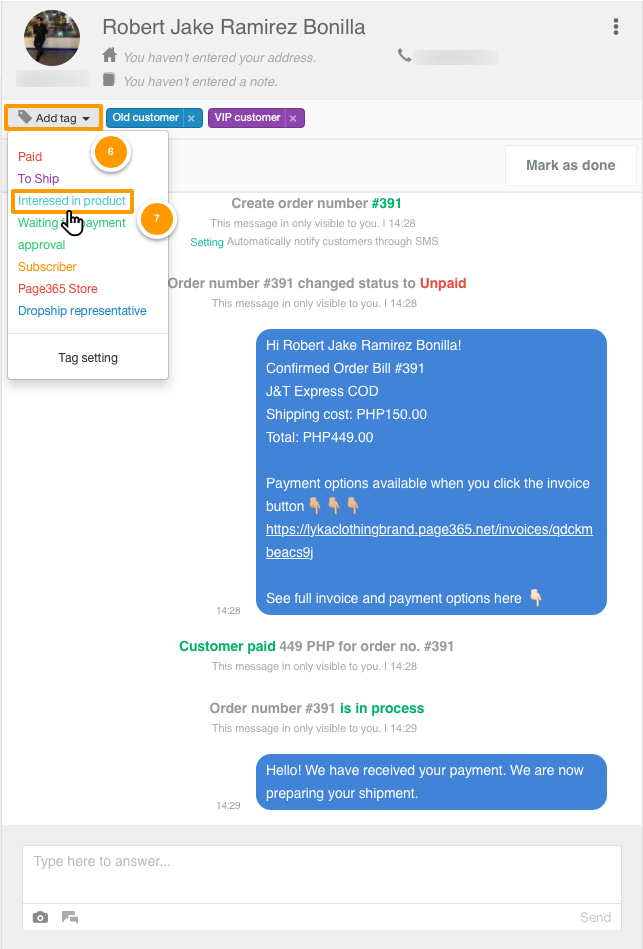
6. Go to the customer conversation, click "Add Tag", all tags will be displayed. Then select the tag you want to attach to the customer.
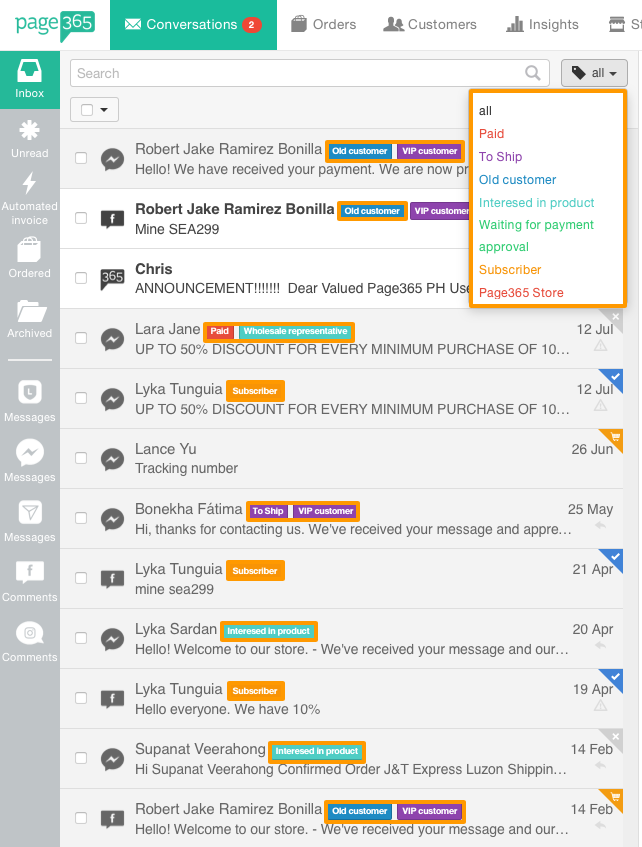
How to use tags to filter customer conversations
1. Click the "All" tag button.
2. Click "Tag" that you want to filter customers.
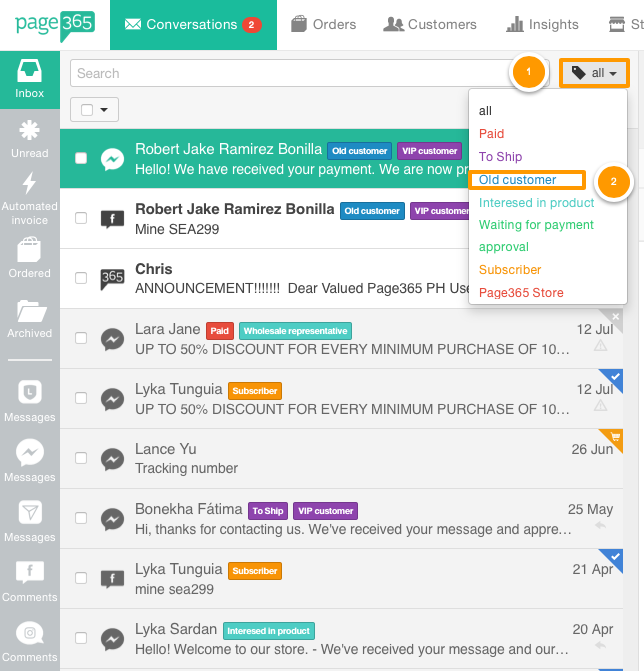
3. Go to the “Conversation" page, click the "All" tag button, and then select the tags you want to filter. The system will then display the "tagged" conversations.

Restrictions on each package
The number of tags is limited based on the users package.
- Free: Up to 3 tags can be set.
- Solo: Up to 6 tags can be set.
- Pro: 50 tags can be set.
- SME: 100 tags can be set
- Enterprise: 300 tags can be set.
***Shops can learn more details from the package.
For more information You can contact directly with the Page365 customer representatives.